Monday, March 21, 2011

Spring Grass

First day of spring today!  Can't wait til the weather gets warm.  Everything is still soggy and dull from the cold.  Well, at least we can make our nails more spring-like until things start to bloom.


You will need:
  • Joe Jade (green cream)
  • Jordana Lemon Tropic (light green pearl)
  • Sally Hansen Mellow Yellow (yellow cream)
  • Wet n' Wild Red Red (red cream)
  • Jordana Black
  • Small paint brush
  • Contact container (or some kind of paint dish)
  • 35 mins
Bring spring!

1.  Put green, light green and yellow into the contact case.  You can paint your nails a light green base before starting.

2.  Make small strokes with the darkest green first.  You want to paint in different directions to give the effect of grass.

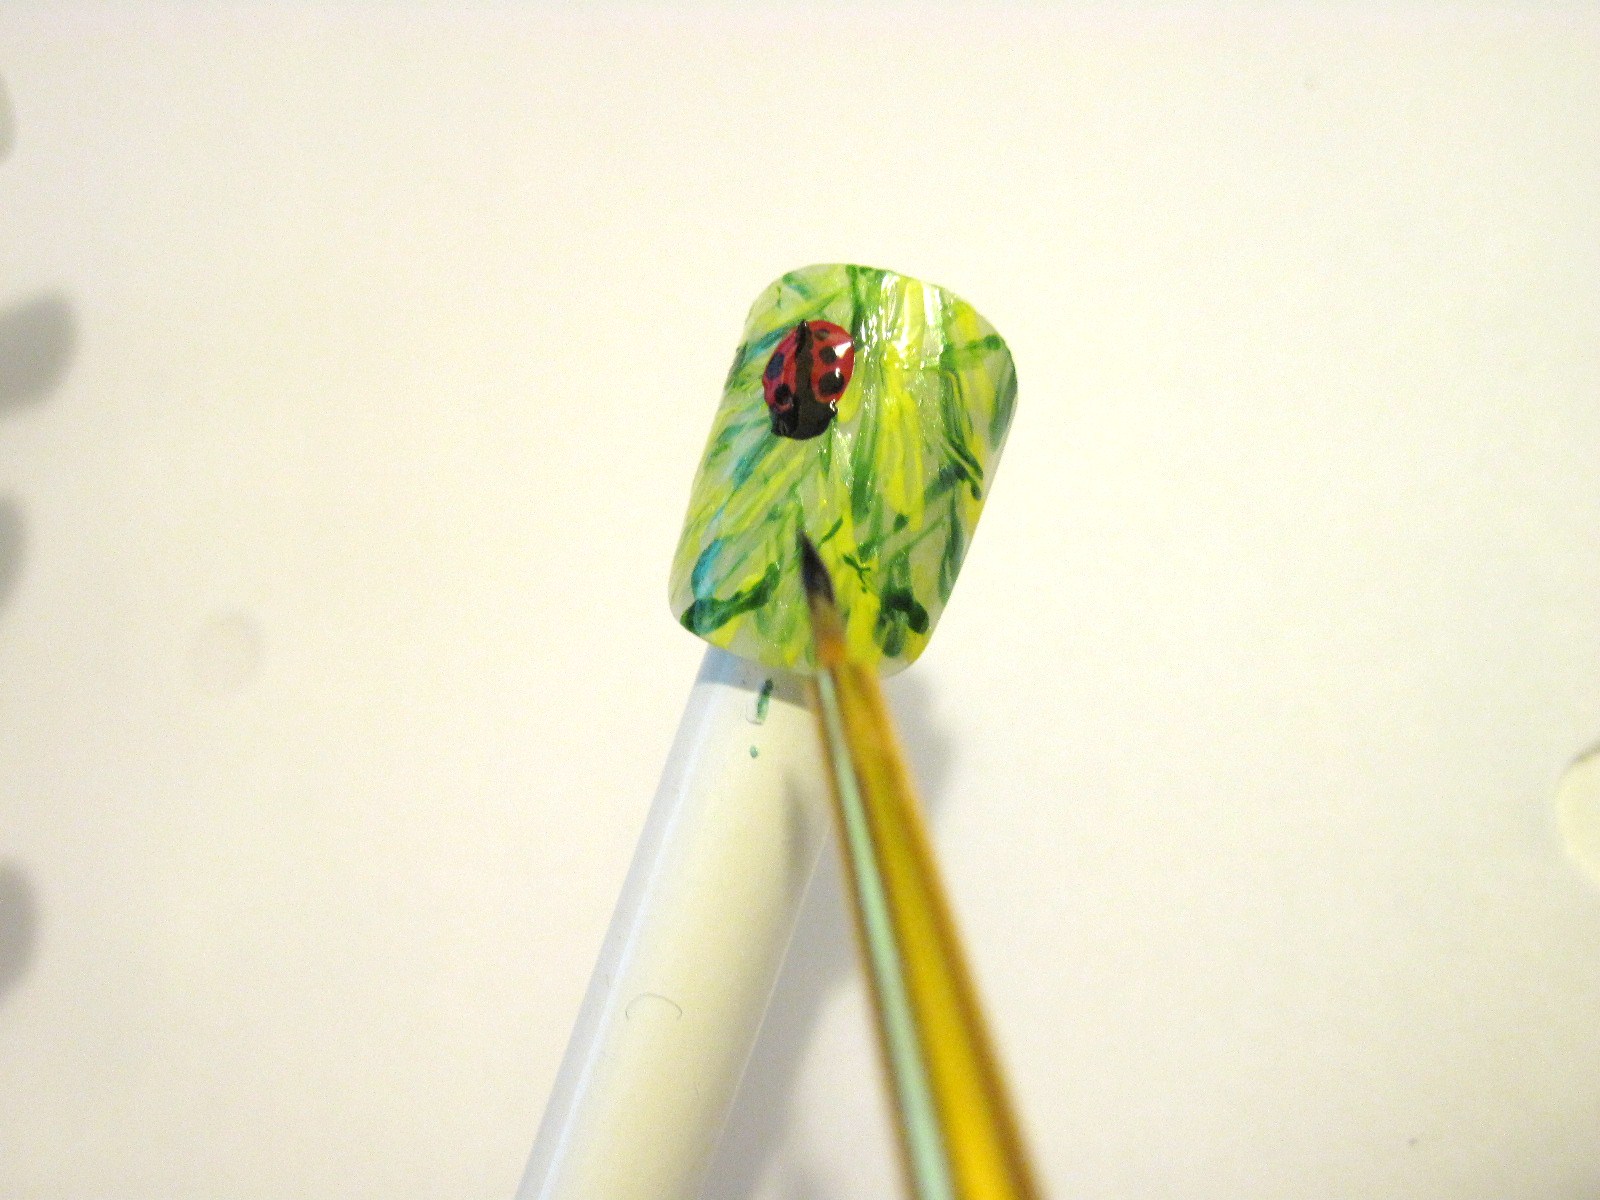
3.  Continue with the light green and yellow.  You should end up with something like this.  A grassy lawn on your nails.  You can top coat this and leave it as is or continue to the next step.

4.  Put a dot of red on the nail.  This will be a lady bug!

5.  After the red dries, paint over it with black to look like a lady bug.  You don't have to do this to every finger.  Top coat everything to seal it.

It's not a subtle design but it's fun.  Spring up your fingers!

Good luck!

- SheNailedMe

Sunday, March 20, 2011

Coupons!!

If anyone is interested in some good beauty coupons, head to your nearest Superstore!


I'm missing 1 coupon, which is $2 off Joe lip products as well =)

Get them while they're still around!

- SheNailedMe

Purple Marbles

The lovely Stefeuille recommended that I try out a marble/swirl pattern.  I've done this before but it got messy and frustrating.  It's a little bit better this time around.  This design reminds me of the marbles I used to play with when I was little.  I decided to do this on my own nails since it's the weekend =)


What you will need:
  • Rimmel Nail Tip Whitener (cream white)
  • Joe Faded Violet (cream lavender)
  • Wet n' Wild Soul Mate (metalic purple)
  • Jordana Black
  • A disposable cup
  • Lukewarm water
  • Toothpicks (the pointy ones are better)
  • Tape (optional)
  • 45 mins (maybe longer if it's your first time)


Time to get messy.


1. Paint your nails with a base coat or base colour to begin with.  The polish will stick better on pre-painted nails.  Tape around your fingers leaving the nails exposed.  Don't forget the pad of your fingers too! (You can skip the tape if you don't mind using polish remover around the nails.)

 2.  Drip single drops into a cup of lukewarm water.  Drip them one on top of the other.  Play with the order.  You have to work fast! Otherwise, the polish will dry before you can do anything with it!  I usually leave the bottles untwisted to make this process faster.

3.  Take a toothpick and drag along the surface of the polish you dripped in.  Do not dip the whole toothpick in!  Just the tip.  Again, work fast!  When you're satisfied, you're ready for the next step.

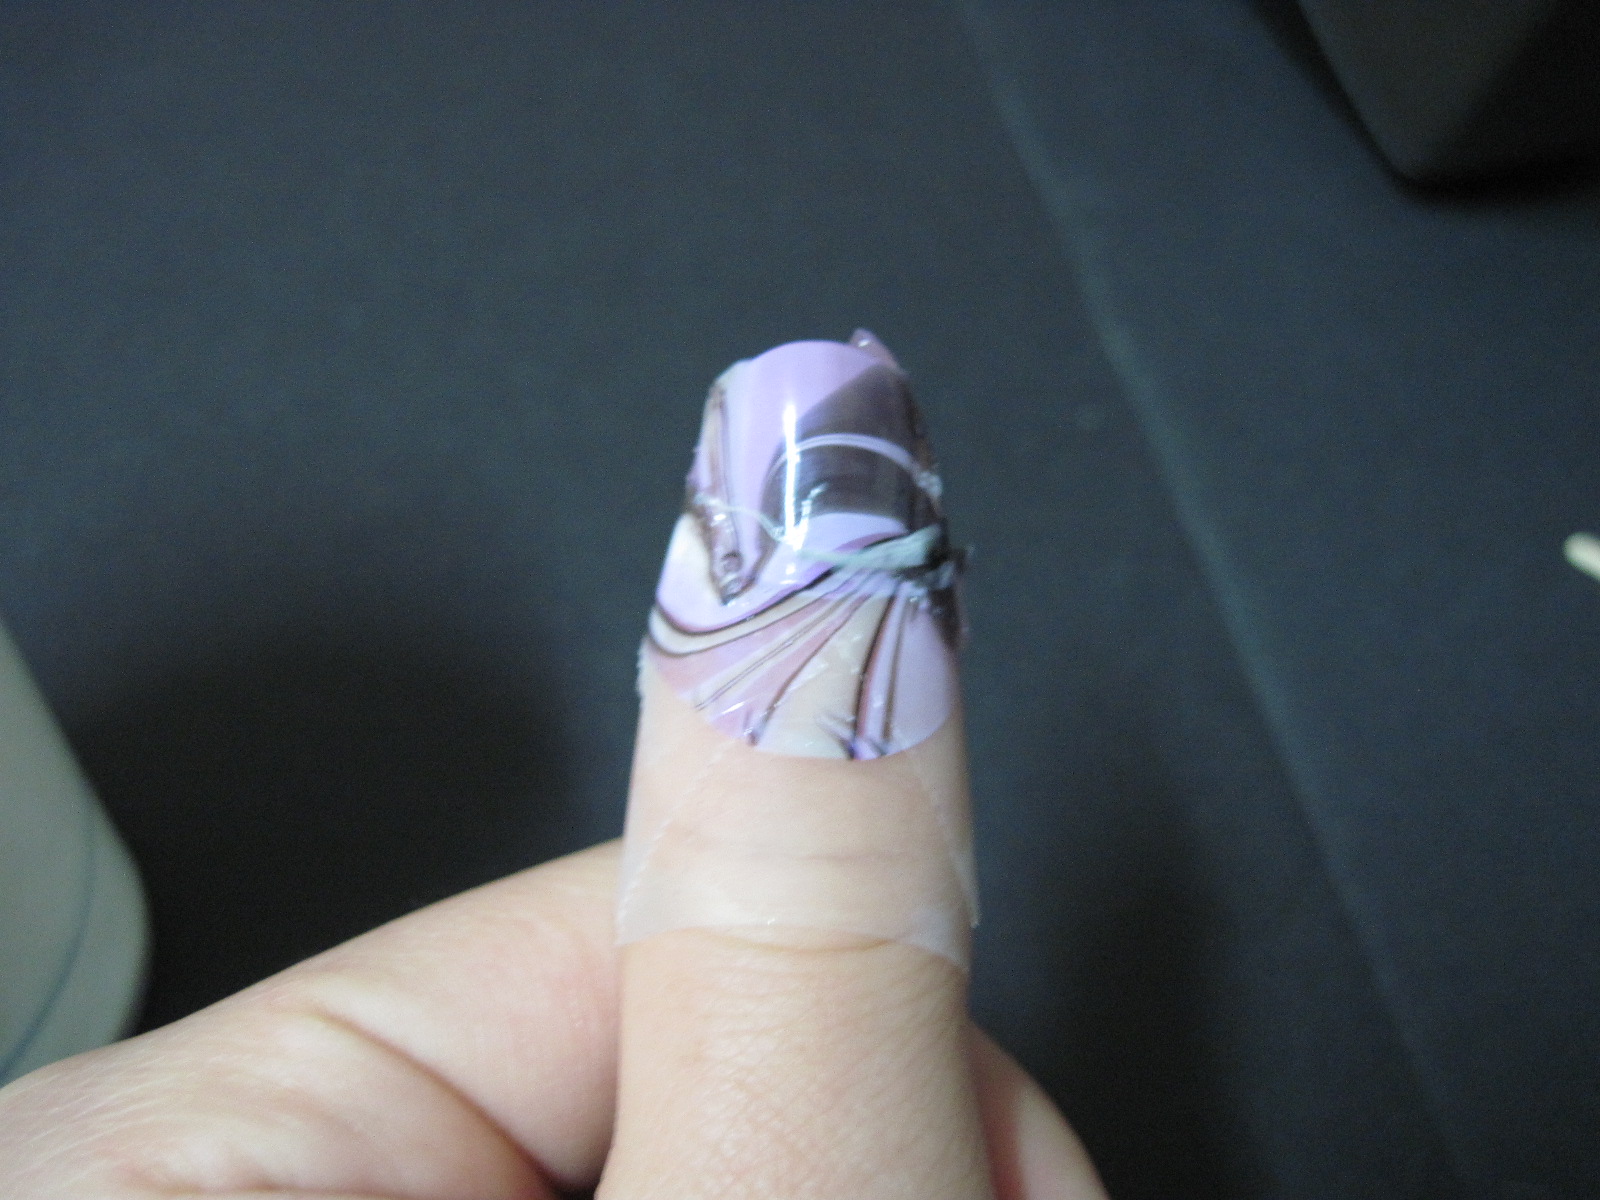
4.  Pick an area on the design that you like and quickly dip your nail in facing down into it.  While keeping your finger in there, use the toothpick to push the surrounding polish away.  Once it's clear, pull your finger out.

5.  You should have something like this.  Pull off the tape. (Or use polish remover if you didn't tape.)

6.  You should have something like this.  There's a small booboo on it but the other nails turned out ok.  No two nails will look alike so it's different every time!


One tip to note is that the runnier your nail polish is, the better.  The thicker stuff doesn't spread in the water quite as well.

What colours will you use?  Experiment with different finishes too.


Good luck!

- SheNailedMe

Thursday, March 17, 2011

Tiffany's Manicure

My playlist on my iTunes is on random.  It played Breakfast at Tiffany's and I thought, I had to do it.  I bought a Tiffany's inspired colour a while ago and usually wear it on it's own.  Let's do something more fancy.


What you will need:
  • China Glaze For Audrey (creamy "Tiffany's" colour)
  • Rimmel Nail Tip Whitener (creamy white)
  • Rimmel Super Wear Top Coat
  • Thin paintbrush
  • Manicure aid stickers
  • Clear decorative beads or gems (I got mine from the dollar store)
  • 60 mins


And I said, "What about breakfast at Tiffany's??"


1. You can paint a base coat if you'd like.  Use tape or a manicure aid sticker to help guide you in painting the tips. My manicure aid stickers are from Sally Hansen bought at Walmart.

2. Paint the tips a Tiffany's colour. Don't worry about getting it on the guides, it's suppose to help you.

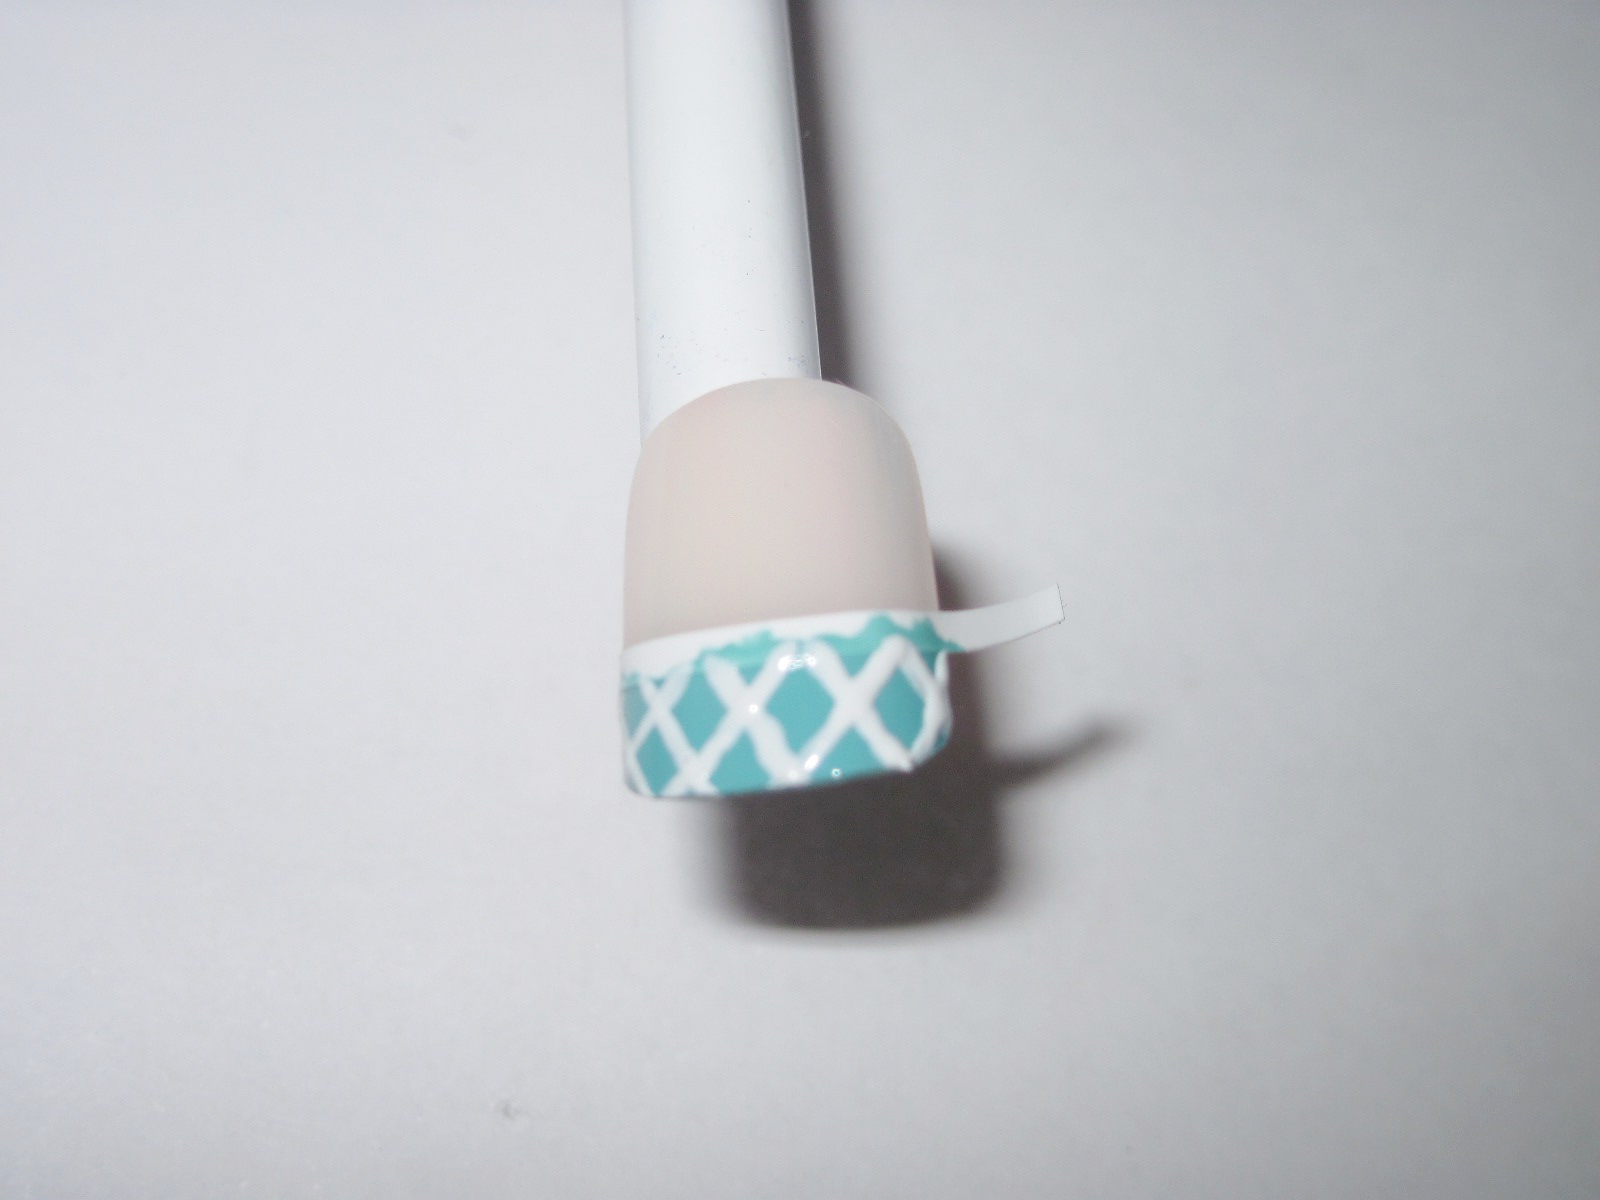
3.  Now paint diagonal lines with white polish and a thin paintbrush.  The thinner the better.  A steady resting hand is the trick.

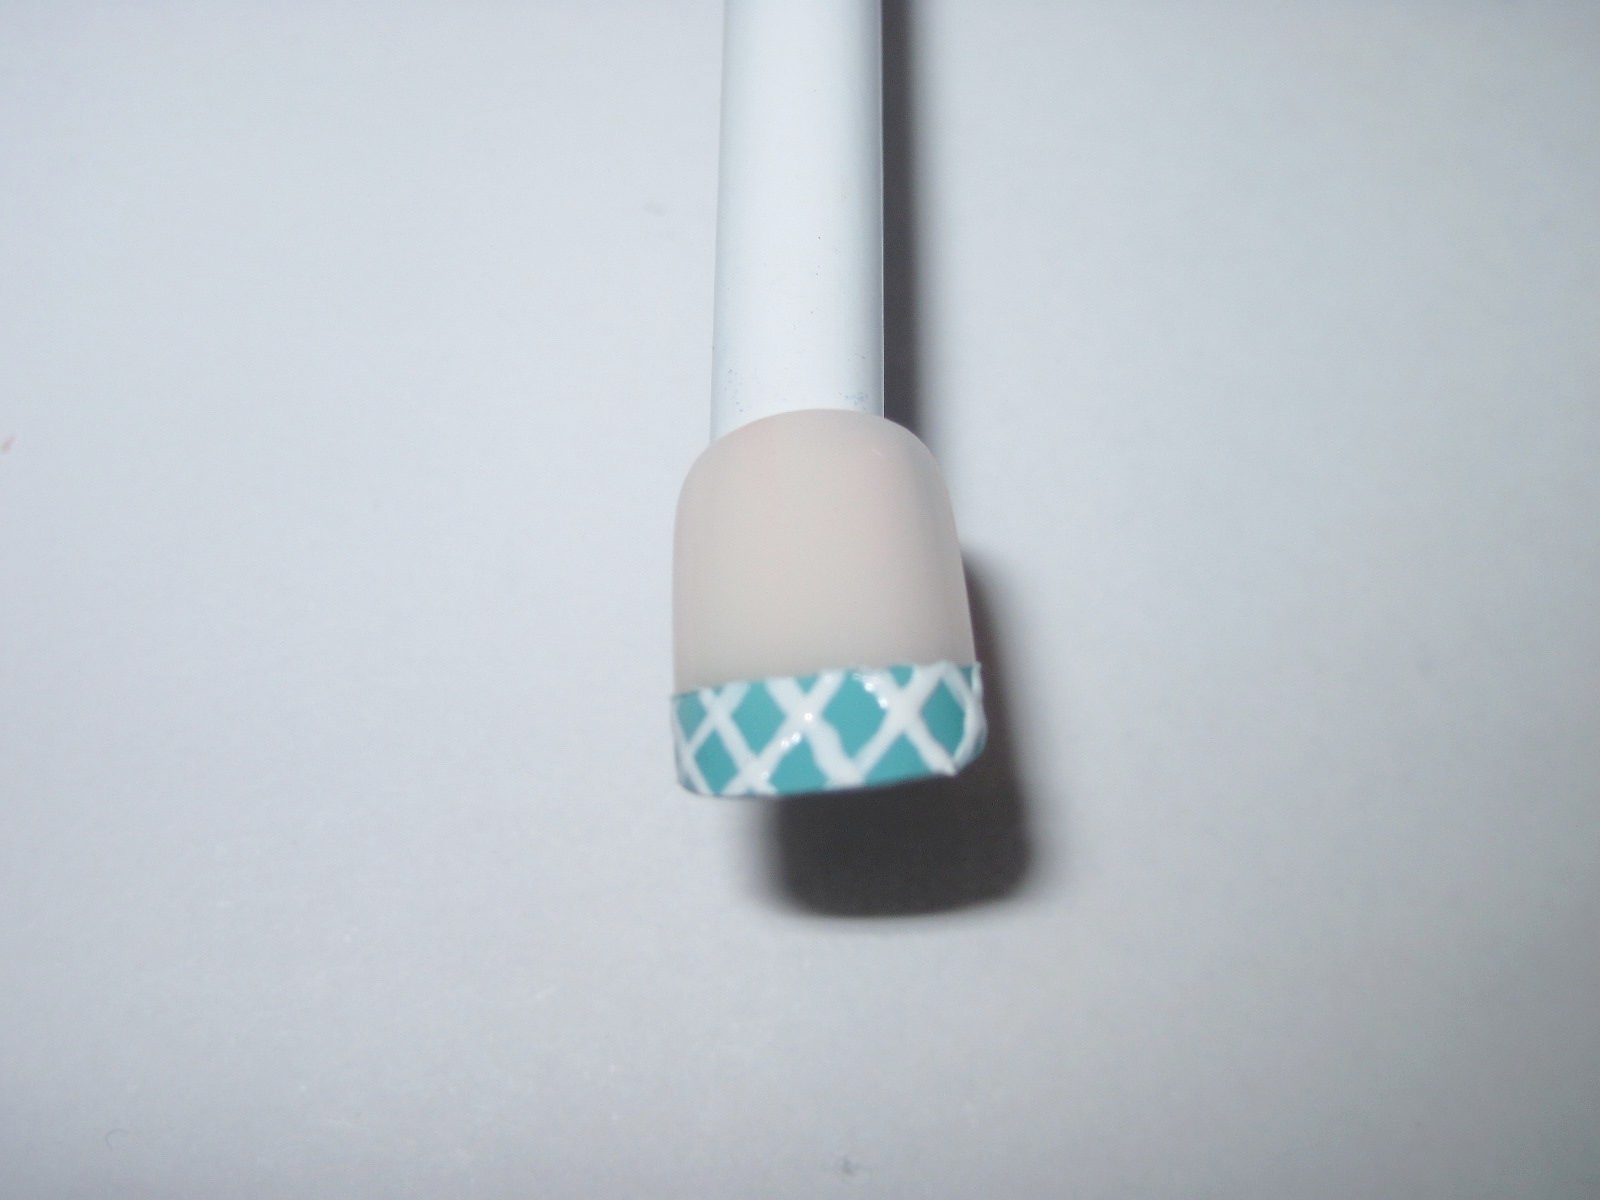
4.  Remove the tape and it should look something like this.  You can leave it like this and add a top coat.  Or you can get fancy!!

4.  Paint over the entire nail with a top coat.  Use a thin paintbrush/toothpick/paperclip to attach small decorative beads on the border and other areas while it's still tacky.  Paint over the entire nail again with a top coat to seal it.

5.  You can change up the decorative beads on different nails too!  You don't have to follow my instructions exactly.  I made a booboo on my ring and pinky finger.  Mistakes happen =P


She said, "I think I remember the film, And as I recall, I think, we both kinda liked it."
And I said, "Well, that's one thing we've got."


Good luck! =)

- SheNailedMe

Wednesday, March 16, 2011

Newspaper Print

If you're a fan of text/typography, this could be fun! A simple newspaper design can look fun yet subtle. I used newspaper in this design but you can print off and use any font/text you like.


What you will need:
  • Joe Butter (cream light yellow color)
  • Rimmel top coat
  • Pieces of newspaper or other printed text (works better with laser/toner printers)
  • Rubbing alcohol
  • Small container


Print shop!


1. Paint entire nail with Joe Butter.  You may need a few coats to get the true colour streak free.

2. Pour rubbing alcohol into a small container for your nail to dip in.  Dip in your nail for at least 30 seconds.

3. A piece of newspaper over top with the text side down on the nail.  Keep it there for 20 seconds or until the ink transfers on.

4.  Peel and you have the print on your nail!  Paint over it with a top coat to prevent the text from rubbing off.


If the text is not transferring well after a few nails, dump the old rubbing alcohol and pour in a fresh batch.  Remember, your nail has to be completely dipped in the rubbing alcohol.

So what's in the news today?

Good luck!


- SheNailedMe

Tuesday, March 15, 2011

Mario Mushrooms

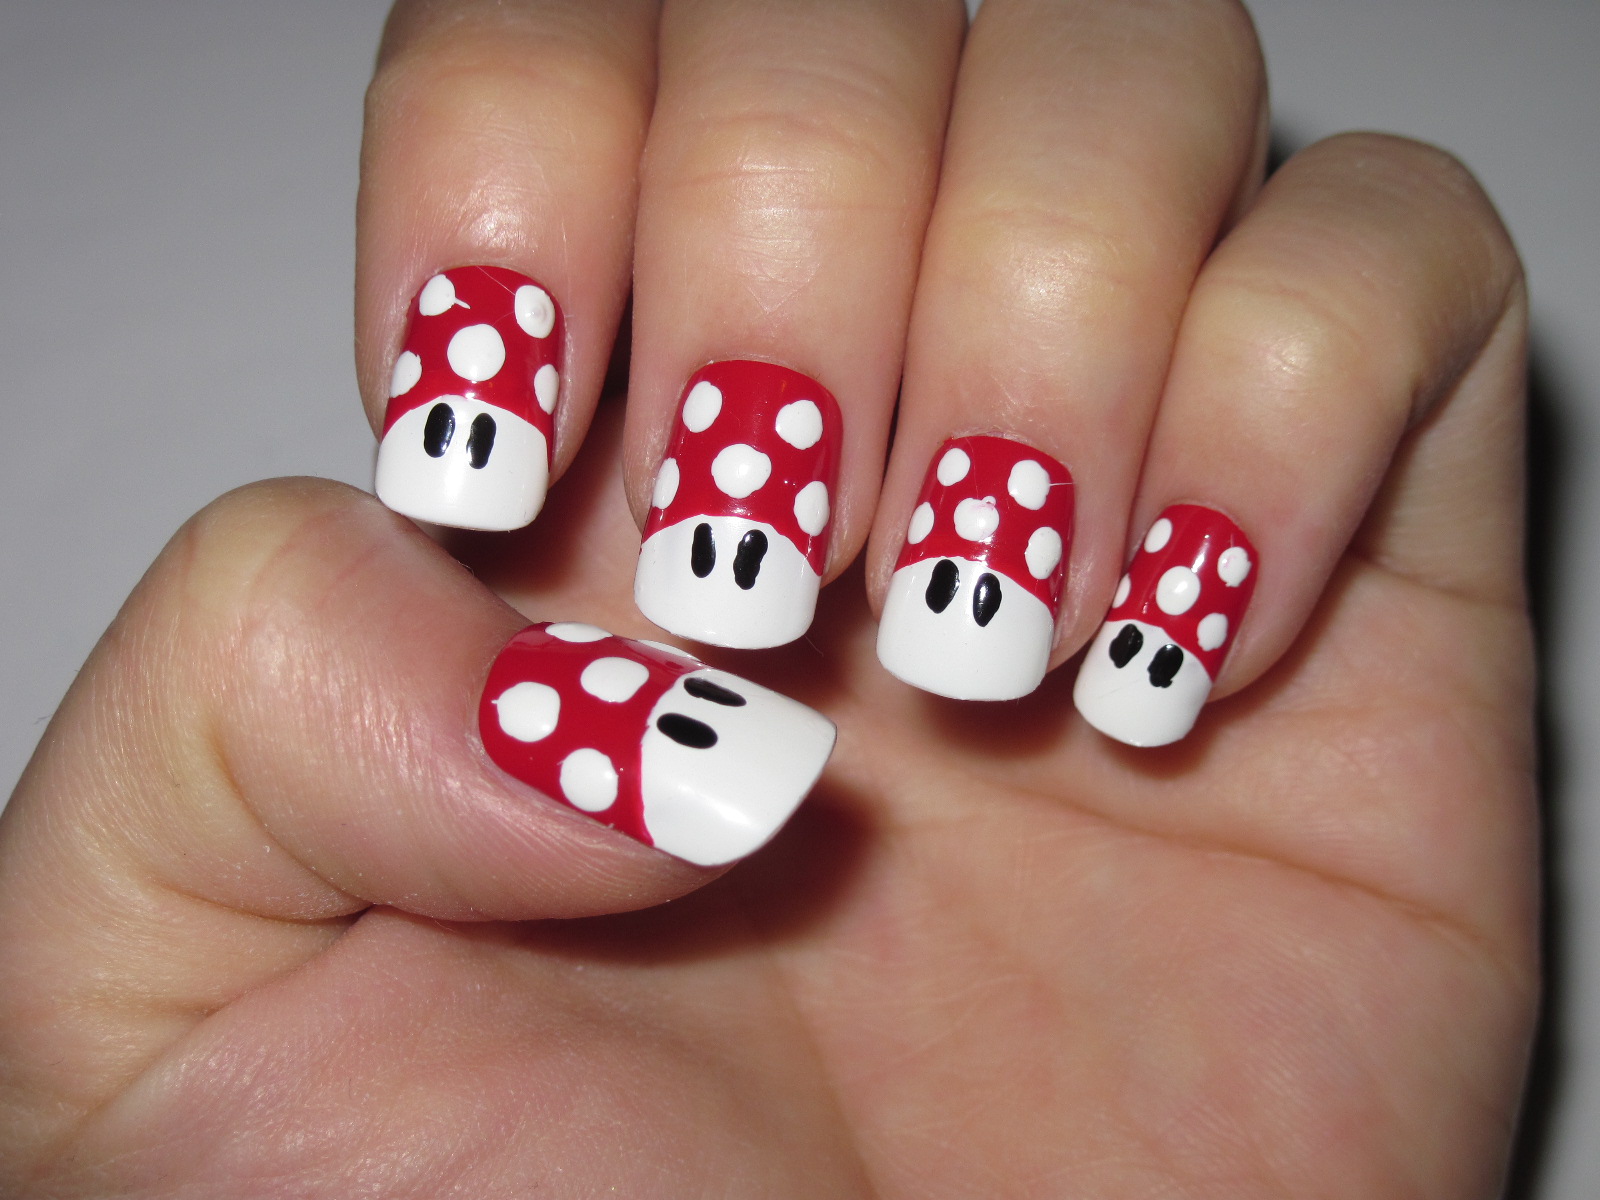
Whoever owned a Nintendo back in the day must have had at least one Super Mario game.  I loved playing Super Mario and I still do!  Why not decorate your nails to give your game a little edge?


What you will need:
  • Wet n' Wild Red Red (Red cream colour)
  • Sally Hansen White on (White cream colour)
  • Jordana Black (Black cream colour)
  • Paper clip
  • Contacts case

 
Game time!

    1. Since we're working with red, you should put a base coat on so it doesn't stain your nails.  Paint on 2/3's of the tip of your nails in Wet n' Wild's Red Red.  Make sure you curve the paint so it's rounded towards the finger.

    2. Paint the other 1/3 in Sally Hansen's White On.

    3. Put some Sally Hansen's White On in a contact case.  Dip the paper clip in and make dots on the nail in the red section.

    4. Put Jordana's Black in the contact case.  Dip the paper clip in and make two eyes in the white area.

    5. You may put a top coat on if you want. Voila! You're done!


    Gaming can be pretty too =)
    This look is also great for short nails.

    If you're curious, I don't paint on my own nails nor wear acrylics right now because of where I currently work.  I usually paint them on the weekends.  So that's why you see me painting on fake nails instead of my own.

    Good luck!

    - SheNailedMe

    Monday, March 14, 2011

    Grey Gradient

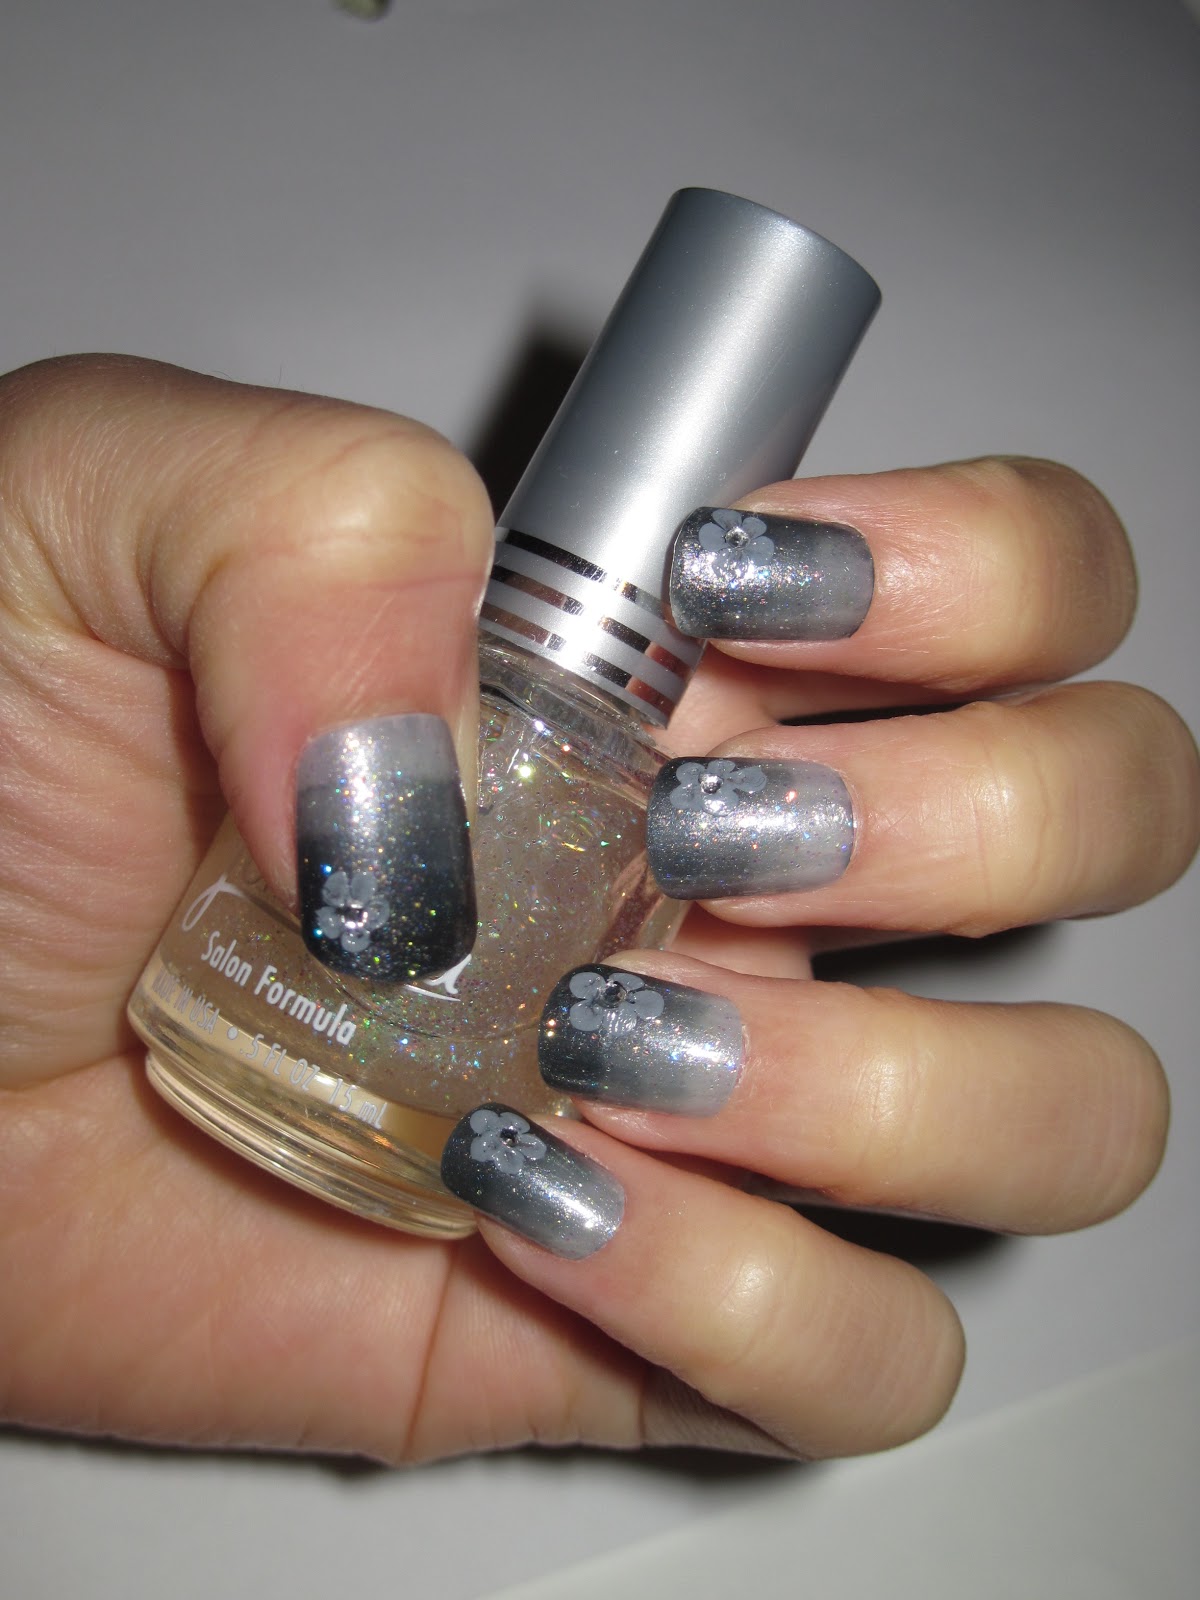
    The rain in Vancouver doesn't have to be gloomy.  I got my inspiration this week from the weather we have been having.


    You will need:
    • OPI Brand New Skates (sheer shimmery grey polish)
    • Jordana Crystal Glitter (clear glitter polish)
    • Rimmel Grey Matter (creamy grey polish)
    • Paper clip
    • Contacts container


    Let's get started!


    1. Paint layers onto your nail getting closer to the tip each time.

    2. Paint a layer of clear glitter over top.  You can add a top coat and leave the design as is or continue to the next step.

    3. Put a creamy grey into a contacts container for dipping.

    4. Dip the paper clip into the creamy grey polish and dot 5 dots in a circle.

    5. Let the creamy grey dry until it is tacky.  With the paper clip, drag a dot in towards the center of the circle creating a dip.  Do this with all 5 dots.

    6.  It should look like a flower in the end.

    7. Add a little gem in the center of your flower and you're done!


    Rainy days aren't so bad =)
     
    Good luck!


    - SheNailedMe