Monday, December 26, 2011

Let it snow... please?

I was hoping for a white Christmas here but it was just a wet one =(
As long as I spend the holidays with good company, I don't really mind.

Cheers to the snow that never happened!


You will need:
  • Le Chat Ultra Bond BaseCoat
  • Claire's Pearly/Shimmery pale blue polish (no name)
  • Wet n' Wild in French White Creme
  • Le Chat Ultra Fast Dry TopCoat
  • Small Paintbrush

 1. Paint a shimmery/pearly pale blue base.

 2. With a small paint brush, paint the first line for the snowflake.

 3.  You're basically going to make an asterisk (*).  One cross should me bigger than the other.

 4. Now Start with one of the longer arms and make 2 dashes coming out of it.  Continue all around.

 5.  Now continue making dashes on the smaller arms.

 6.  Make small X's and dots around the big snowflake.  Seal with a top coat.


Hope everyone had a wonderful Christmas!

- SheNailedMe

Thursday, December 22, 2011

Baby Sparks

I really couldn't think of a name for this one.  But it's pretty anyway =)


You will need:
  • Le Chat Ultra Bond BaseCoat
  • Revlon in Peach Petal
  • Wet n' Wild in French White Creme
  • Sparkly/glittery polish
  • Gem
  • Dotting tool/toothpick
  • Le Chat Ultra Fast Dry TopCoat
 Forgot to put French White Creme in the picture =(

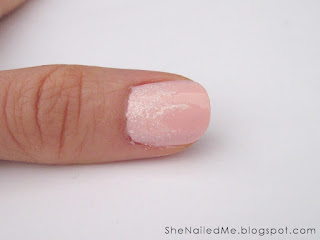
1.  Baby pink to start.

2.  Paint half of the nail with glittery polish.  Neatness is not necessary =)

3.  While the glitter polish is still wet, apply gems with a toothpick on 1/3 of the nail randomly.

4.  Dot around the gems with a white polish and a dotting tool.  Top coat to finish.


Hope you liked it! <3

- SheNailedMe

Blog from my phone??

Blogger app seems promising. Still has a few things to work out though. In the meant time...

I really enjoy my mustache ring :)
(tutorial to come)

Wednesday, December 21, 2011

Bells of Holly

Another holiday theme!!


You will need:
  • Le Chat Ultra Bond BaseCoat
  • NYC in Plush Platinum
  • Joe in Jade
  • Some red gems or beads
  • Toothpick
  • Le Chat Ultra Fast Dry TopCoat

 1.  Start with a pearly base colour.  I had to use about 3 coats of Plush Platinum.

2.  Dab on the side with a green polish.  You don't have to be neat.  Make sure you get some jagged looking edges.

3. While the green is still wet, use a toothpick to pick up your gems/beads and place them on.  Again, you don't have to be neat.  Top coat over it all to seal it.


4.  To make a tree, you do the same as before but make a triangular shape as opposed to dabbing on the side.  I added a yellow gem at the top of the tree.  It would look better with a star gem.


Deck the halls with bells of holly!  Fa la la la la la la la....

- SheNailedMe

Tuesday, December 20, 2011

Peppermint Swirl

Peppermint candies remind me of the holiday season.  I especially love it when a peppermint candy cane is in my hot chocolate.

Here's another simple tutorial (if you have a steady hand).


You will need:
  • Le Chat Ultra Bond BaseCoat
  • Wet n' Wild French White Creme
  • OPI Bullish on OPI
  • Glittery polish (optional)
  • Le Chat Ultra Fast Dry TopCoat
  • Paintbrush
  • Contact lens case
 It's gonna get sweet =)

1.  Paint your base coat and then white all over the nail.  I painted 2 coats here.


 2.  Paint a curved line from the center to the side.  Then from the same point in the center, draw another curved line but ending it at a different point next the the first line.

3. Colour it in!  You should have something like this.

4.  Continue on with the rest of the nail.  Start from the same point every time.

5.  It should end up looking something like this.  I did 4 little curved triangles. You can do as many as you'd like, but I stuck with 4 because it was easier to divide evenly.  You can add a wash of glitter or just top coat the whole thing.


As you can see, I also did some stripes instead of making all my nails peppermint swirls.
Hope you can have fun with this too!

I need a better camera =.=

- SheNailedMe

Monday, December 19, 2011

Ice Tips

Sorry!!  It would take forever to explain why I've been away for so long.
Simply, I've been busy.

Here's a quick tutorial on this simple yet flashy look for this cold weather.


You will need:
  • Le Chat Ultra Bond BaseCoat
  • Essie in Cocktail Bling
  • Sally Hansen Crackle Overcoat in Fractured Foil
  • Silver glitter polish
  • Le Chat Ultra Fast Dry TopCoat
Let's get started!

1.  Paint your base coat and then Cocktail Bling.  The best way I can describe this colour is that it's a pale greyish blue.

2.  Thinly apply Fractured Foil to about half of the nail.  Don't worry about it being evenly divided.

3.  Paint some glitter over the whole nail but concentrating on the silver tips.  Add a top coat.


I have a week off work so hopefully I can squeeze in some more tutorials before I get back to work.
Hope everyone has a Happy Holiday =)

- SheNailedMe