Showing posts with label blue. Show all posts

Monday, December 26, 2011

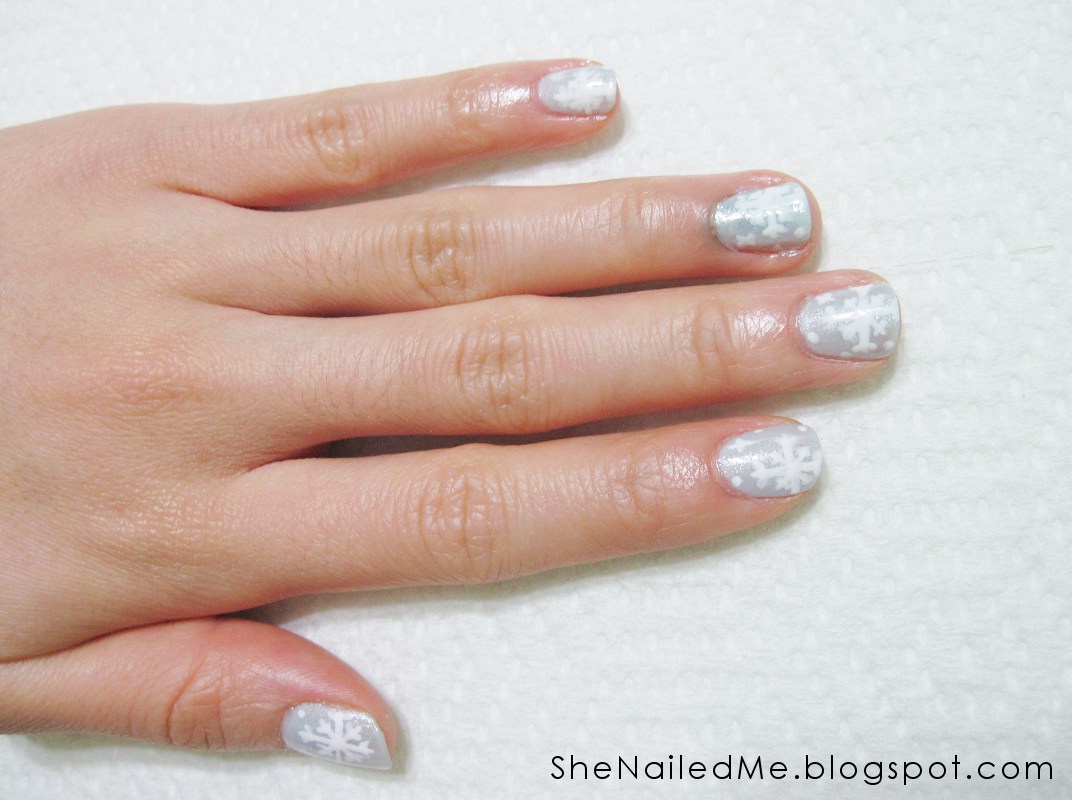
Let it snow... please?

I was hoping for a white Christmas here but it was just a wet one =(
As long as I spend the holidays with good company, I don't really mind.

Cheers to the snow that never happened!


You will need:
  • Le Chat Ultra Bond BaseCoat
  • Claire's Pearly/Shimmery pale blue polish (no name)
  • Wet n' Wild in French White Creme
  • Le Chat Ultra Fast Dry TopCoat
  • Small Paintbrush

 1. Paint a shimmery/pearly pale blue base.

 2. With a small paint brush, paint the first line for the snowflake.

 3.  You're basically going to make an asterisk (*).  One cross should me bigger than the other.

 4. Now Start with one of the longer arms and make 2 dashes coming out of it.  Continue all around.

 5.  Now continue making dashes on the smaller arms.

 6.  Make small X's and dots around the big snowflake.  Seal with a top coat.


Hope everyone had a wonderful Christmas!

- SheNailedMe

Monday, December 19, 2011

Ice Tips

Sorry!!  It would take forever to explain why I've been away for so long.
Simply, I've been busy.

Here's a quick tutorial on this simple yet flashy look for this cold weather.


You will need:
  • Le Chat Ultra Bond BaseCoat
  • Essie in Cocktail Bling
  • Sally Hansen Crackle Overcoat in Fractured Foil
  • Silver glitter polish
  • Le Chat Ultra Fast Dry TopCoat
Let's get started!

1.  Paint your base coat and then Cocktail Bling.  The best way I can describe this colour is that it's a pale greyish blue.

2.  Thinly apply Fractured Foil to about half of the nail.  Don't worry about it being evenly divided.

3.  Paint some glitter over the whole nail but concentrating on the silver tips.  Add a top coat.


I have a week off work so hopefully I can squeeze in some more tutorials before I get back to work.
Hope everyone has a Happy Holiday =)

- SheNailedMe

Tuesday, September 13, 2011

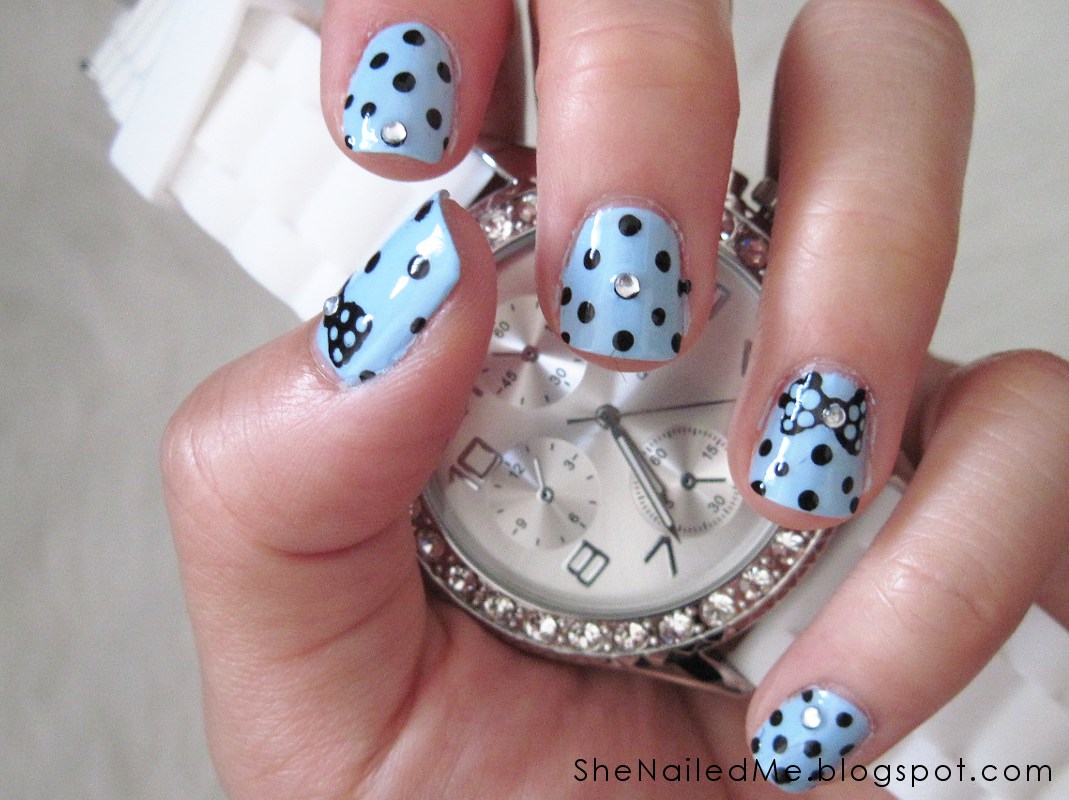
Something Blue

I wanted something girly.  Here it is!


You will need:
  • Joe in Powder Blue
  • Jordana in Black
  • Seche Vite Top Coat
  • Dotting tool
  • Gems

1.  Start with a pale blue base colour (or any other colour you'd like).

2.  Dot the nail with small black dots.  Try and make them even and aligned.

3.  Make a bow at the bottom of the nail.  I kept to the dotting tool with this one.

4.  With the same base colour, dot over the bow.

5.  Add a clear gem to the middle of the dot.  Continue with this theme for your other nails.  Don't forget to top coat to seal it in!


Hope you liked this.  Keeping this blog updated is harder than I thought!  I need to clear up my schedule!

- SheNailedMe

Saturday, May 21, 2011

Electric tape

Use tape to get easy clean lines.  You can make many different looks with tape and this is just one of them.  You have to make sure your base polish is completely dry before you put tape over it.  The other tip is to also stick the tape on your skin first so the oils on your skin make the tape less sticky but sticky enough to stay on the nail.  Otherwise, you'll pull the polish off with the tape.

You will need:
  • Sally Hansen Xtreme Wear Blue Me Away!
  • Color Club Smoke and Mirrors
  • Tape and Scissors

1.  Paint a metallic base.  I'm loving Smoke and Mirrors from Color Club.  It's a matte polish and very metalic.

2.  Cut thin strips of tape.  Arrange the tape any way you'd like.  I make an "H" shape.

3.  Paint over the whole thing with another colour and take the tape off.


That was easy!  There's lots you can do with tape.  I'll show some other tape designs soon.

Happy Victoria Day long weekend!

- SheNailedMe

Friday, May 13, 2011

Turquoise Night

One of my younger cousins is graduating from high school very soon.  Congrats girl!  Her dress is gorgeous and I was inspired to do something similar to the colours in her dress.  I hope she doesn't mind.  It's actually a really easy effect to do.


You will need:
  • China Glaze For Audrey
  • Wet n Wild Sapphire
  • Sinful Colors Hottie
  • Rimmel Top Coat
  • Makeup sponge

1.  Paint a turquoise base.

2.  Dab on some dark blue on a makeup sponge.  The better quality the sponge, the less clumps you will get.  Don't put on too much or you won't be able to create a good gradient effect.

3.  Dab the sponge on the nail starting from the tip.  You want the tip to the be the darkest and then fading towards the cuticle.

 4.  You should have something like this by the end of it.  Don't worry about being messy.

5.  Messiness is no problem because a glitter polish over the whole thing will pull it together.  I'm using Sinful Colors in Hottie.  It's sort of a dupe for OPI's Katy Perry Collection in Last Friday Night.

6.  Add a top coat to blend it all together.


I love the colours!  I often do the sponging effect over naked nails instead because I find it's a little more tamed.  But hey, it's grad and you wanna stand out! ^^

Congrats again Mandy!

- SheNailedMe