Showing posts with label purple. Show all posts

Monday, August 29, 2011

Dot Gradient

Very simple and very wearable.  Enough said!


You will need:
  • Revlon in Peach Petal
  • Joe in Orchid
  • Wet n Wild Mega Last in Soul Mate
  • Joe in Faded Violet
  • Rimmel Nail Tip Whitener
  • Top coat of your choice
  • Dotting tool
When I picked the colours for dotting, I decided on purple dots and then selected 3 shades of purple.

 1.  Start off with a base colour.

2.  Start with the darkest shade.  Dot in a straight line across the nail.

 3.  Continue dotting a row.  Each row should get lighter than the last.  I finished my rows with white dots.  Don't forget to top coat!


There you go!  I think I will be sporting this one often.

- SheNailedMe

Monday, May 2, 2011

Patches

Sew together some nail polish!  Well... sort of.  Overall this wasn't a difficult one to do but it does test if you can make short straight lines.

You will need:
  • Joe Faded Violet
  • Joe Orchid
  • Sally Hansen Xtreme Wear White On (not in picture)
  • Color Club Matte Top Coat
  • Thin paintbrush
  • 45 mins
 1.  Paint a base colour (Faded violet from Joe Fresh).  I painted a matte top coat over it but you don't have to do this step.

2.  With the bottle's brush, just make square patches on the nails with a different colour.  I'm using Orchid from Joe Fresh.

3. With white, outline the square.

4.  Paint small perpendicular dashes (or "stitches") along the white line.  There you have it =)


I feel like I would have liked it better if I only painted the design on one nail only or kept the patches consistent with every nail.  Anyhoo, hope you like it!

- SheNailedMe

Tuesday, March 29, 2011

Vintage Florals

Floral prints are hot!  I've been wanting the perfect spring floral dress but haven't had any luck.  That doesn't mean I can't dress up my nails to suit the latest trend.  These nails will have to do for now.(Sorry about the ever changing camera quality and lighting.  Trying to find a good one to work with!)


You will need:
  • Joe Powder Blue (light blue)
  • Joe Orchid (plum)
  • Rimmel Lasting Finish Pro Steel Grey (greyish mauve)
  • Joe Faded Violet (lavender)
  • Joe Jade (green)
  • Joe Butter (light yellow)
  • Thin paintbrush
  • Paint dish
  • 60 mins
Lots of Joe products it seems =P


1. Paint a base coat of light blue (Joe's powder blue).

2. Paint uneven spots with a plum colour (Joe's orchid).  You don't have to be perfect with this.

3.  Paint a greyish mauve (Rimmel's steel grey) on top of the plum colour.  Make sure you leave some plum colour exposed on the edges as shown.  Again, you don't have to make this perfect.

4.  Paint a dot in the center of the spots and thin wavey lines surrounding it as shown with a lavender colour.  You now have your flowers!

5.  I mixed Joe's Jade with Butter to get a lighter shade of green.  Paint small leaves around the flowers with a thin paintbrush.

6.  Paint over the green with some light yellow (Joe's Butter).

7.  Top coat it and you're done!


Experiment with other colours!  This is a really simple design to do because you don't have to be perfect with it.

Feel free to suggest any design ideas! 

- SheNailedMe

Sunday, March 20, 2011

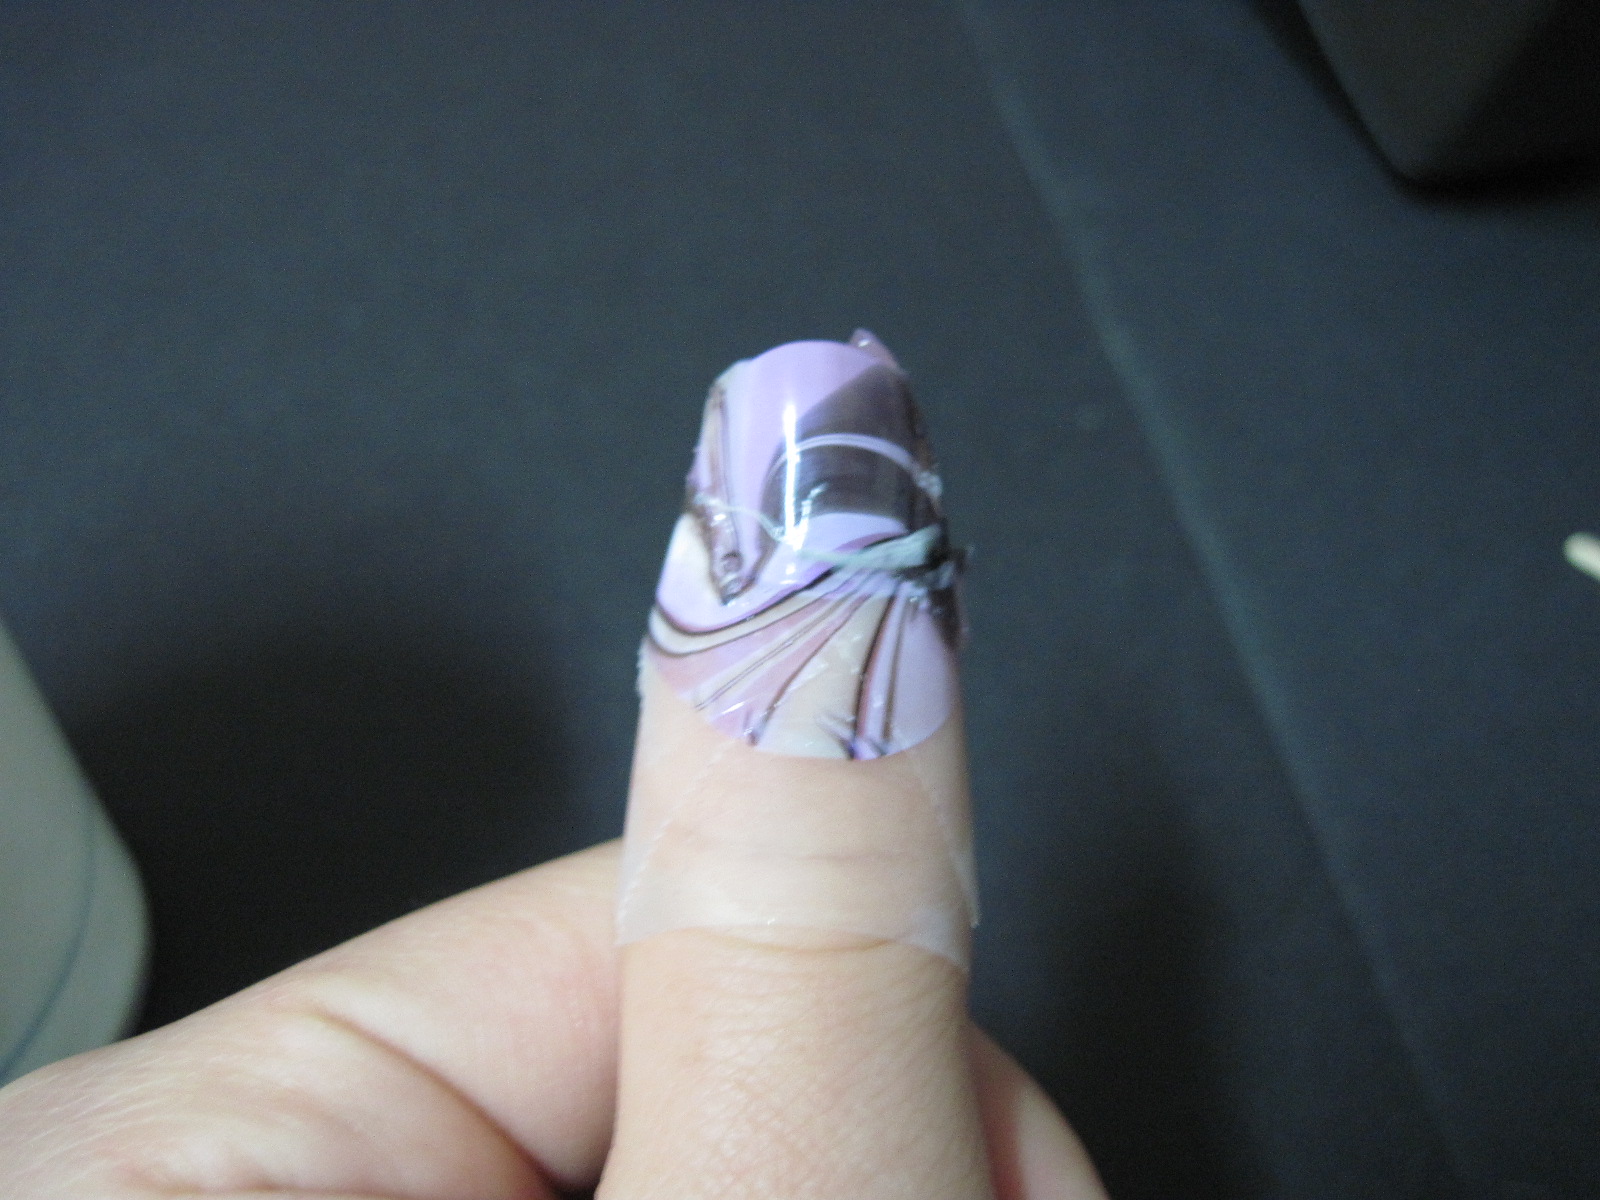
Purple Marbles

The lovely Stefeuille recommended that I try out a marble/swirl pattern.  I've done this before but it got messy and frustrating.  It's a little bit better this time around.  This design reminds me of the marbles I used to play with when I was little.  I decided to do this on my own nails since it's the weekend =)


What you will need:
  • Rimmel Nail Tip Whitener (cream white)
  • Joe Faded Violet (cream lavender)
  • Wet n' Wild Soul Mate (metalic purple)
  • Jordana Black
  • A disposable cup
  • Lukewarm water
  • Toothpicks (the pointy ones are better)
  • Tape (optional)
  • 45 mins (maybe longer if it's your first time)


Time to get messy.


1. Paint your nails with a base coat or base colour to begin with.  The polish will stick better on pre-painted nails.  Tape around your fingers leaving the nails exposed.  Don't forget the pad of your fingers too! (You can skip the tape if you don't mind using polish remover around the nails.)

 2.  Drip single drops into a cup of lukewarm water.  Drip them one on top of the other.  Play with the order.  You have to work fast! Otherwise, the polish will dry before you can do anything with it!  I usually leave the bottles untwisted to make this process faster.

3.  Take a toothpick and drag along the surface of the polish you dripped in.  Do not dip the whole toothpick in!  Just the tip.  Again, work fast!  When you're satisfied, you're ready for the next step.

4.  Pick an area on the design that you like and quickly dip your nail in facing down into it.  While keeping your finger in there, use the toothpick to push the surrounding polish away.  Once it's clear, pull your finger out.

5.  You should have something like this.  Pull off the tape. (Or use polish remover if you didn't tape.)

6.  You should have something like this.  There's a small booboo on it but the other nails turned out ok.  No two nails will look alike so it's different every time!


One tip to note is that the runnier your nail polish is, the better.  The thicker stuff doesn't spread in the water quite as well.

What colours will you use?  Experiment with different finishes too.


Good luck!

- SheNailedMe