Showing posts with label cartoon. Show all posts

Saturday, July 30, 2011

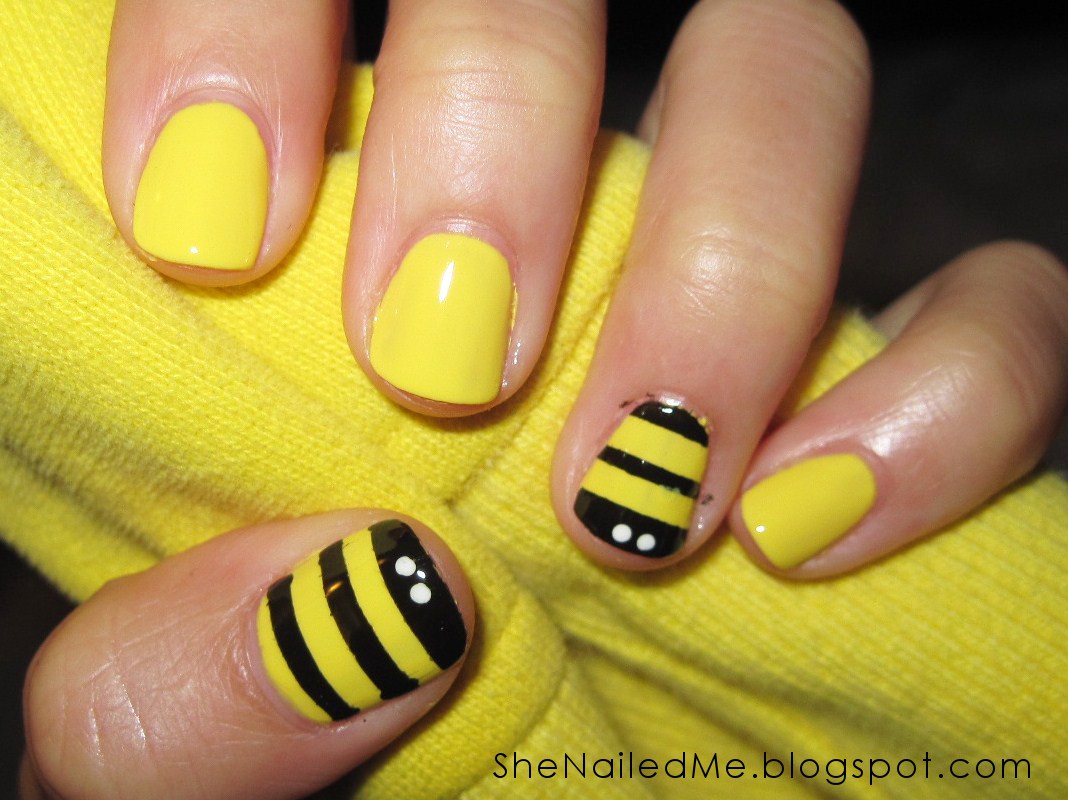
Bumble Bees

Buzz Buzz...

You will need:
  • Sally Hansen Xtreme Wear in Mellow Yellow
  • Jordana in Black
  • Rimmel Nail Tip Whitener
  • Seche Vite Top Coat
  • Dotting tool

1.  Paint your nails in a yellow base.


2.  Cut thin strips of tape and tape them over the nail.  Make sure the tip of your nails is left wider than the others.

3.  Paint over in black.  What ever is not taped will be black.

 4.  Peel off the tape carefully and you should get something like this.

5.  Dot 2 white eyes with a dotting tool.  Top coat it all.


My favourite colour is yellow =)  This is a super cute and super simple design to do.
Happy Pride Week to all Vancouverites!

- SheNailedMe

Thursday, June 23, 2011

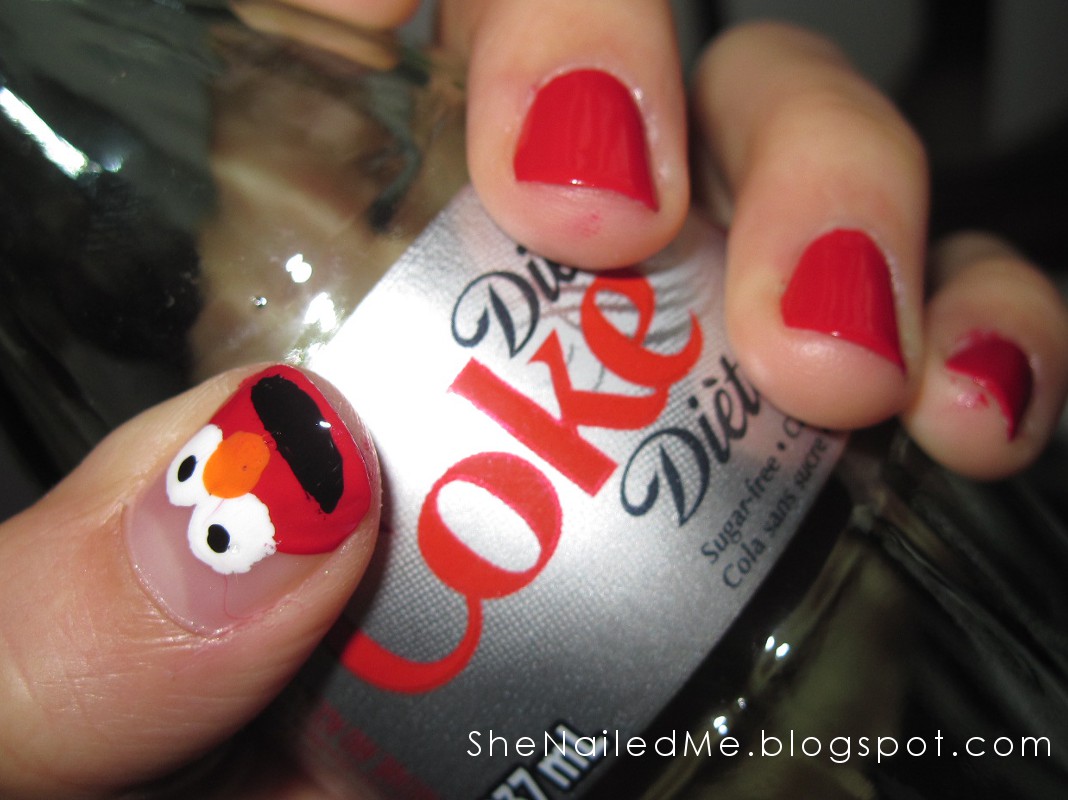
Tickle Me Elmo

You must have grown up watching at least 1 episode of sesame street.  My favourite was Elmo and Big Bird.  I thought I'd go with Elmo this time.  I wanted to wear red =)


You will need:
  • Wet n Wild Wild Shine in Red Red
  • Sally Hansen Xtreme Wear in White on
  • Jordana in Black
  • Joe in Crush
  • Seche Vite Top Coat (Finally got another bottle)

1. Paint a semi circle on the tip of your thumb.

2.  Dot on 2 white dots for the eyes.  Keep them close together.

3.  Paint on the smile with black.  Don't forget to dot his eyes!

4.  Of course, finish with the orange nose and a top coat.


Hope you like this one.  I haven't had much time to do my nails lately.  When I do have time, I can't make them too over the top.  Anyway, I'll try to keep doing at least 1 design a week.  Hope everyone is having a wonderful start to summer!!

- SheNailedMe

Tuesday, June 7, 2011

Hoot Goes the Owl

Owl nails!  I got inspired by a photo album/scrapbook my boyfriend and I are putting together.  There are owls everywhere!  They don't really have a significance to us but they're gosh darn cute =)


You will Need:

  • Sally Hansen Xtreme Wear in Mint Sorbet
  • Sally Hansen Xtreme Wear in White On
  • Revlon in Chocolate Truffle
  • Jordana in Black
  • Top coat of your choice
  • Thin painbrush/dotting tool
 Hoot hoot!

1.  Paint on a colour for the body of your owl.  I chose Mint Sorbet.

2.  Make two larger white dots close to each other.  These will be the eyes.

3.  Outline the white in black with a thin paintbrush.

4.  I dotted the eyes in Chocolate Truffle.

5.  Upside down triangle in between the eyes for the beak.  I also used Chocolate Truffle.

6.  Using the same colour again, give the owl a feathery belly.


I actually find real owls very scary; especially when they turn their heads completely around!  Anyway, I thought this was easy to do and cute.  Hope you have fun with it =)

- SheNailedMe

Monday, May 16, 2011

KeroKeroKeroppi

My boyfriend likes Keroppi.  'Nuff said.  You're gonna need a really steady hand and a lot of time.

You will need:
  • Sally Hansen Xtreme Wear White On
  • Jordana Lemon Tropic
  • Jordana Black
  • Jordana Island Fuchsia
  • Jordana Electric Blue
  • Wet N Wild Red Red
  • Rimmel Cafe Au Lait
  • Rimmel Top Coat
  • Thin paintbrush (couldn't find mine so I did the details with a dotting tool)
That's a lot of polish!

1. White base.  Nice and simple.  I didn't realize how streaky I had the base =S

2.  Paint on green horizontal and vertical lines to make a checkered pattern.  This will be the pattern for all the nails.

3.  Let's paint Keroppi's head.  Paint a dome shape on the tip with green.

4.  Make 3 white circles overlapping the green dome.

5.  Outline Keroppi's head with black.  I outline after painting the inner colour because I find it easier.  Don't forget to give him rosey cheeks!

 6.  Not sure what this guy is called.  It looks like a ghost... or a tissue.  Anyway, you start off with the white shape.  Then the red bow.  And finish off by outlining/drawing in black.

 7.  Keroppi has a snail friend?  Start off with the snail body and head, then the blue shell, then the white eyes, and finally outline/draw in black.

 8. Football shaped head, white eye balls and white body.  Red stripes for his shirt.  Outline it all in black.

9.  Oh look!  A red swirl for a sun.


I think this took me way too long to do because I didn't have my thin paintbrush.  I did it all with a dotting tool.  Make sure you wait for the polish to dry (or close to it) before you outline with black.  The lines will be cleaner.  I used pictures on google as reference.

Have fun =)

- SheNailedMe

Thursday, April 21, 2011

Easter Bunny

Ready for Easter?  The meaning of Easter is differently for many people.  For me, it usually means family time.  For my nails, it means pastels.  Let's get to it!


You will need:
  • Joe Butter (light yellow), Faded Violet (lavender), Powder Blue (light blue)
  • Sally Hansen Xtreme Wear White On
  • Jordana Black
  • Top coat
  • Thin paintbrush
  • Dotting pen/toothpick/paperclip
1.  Paint vertical stripes.

2.  With white, paint part of a circle at the tip for the head of the rabbit.

 3.  The ears are painted with a thin paint brush.  The top of the ears are wider than the bottom.  And I painted one ear flopped.

4.  Dot on 2 eyes and top coat to seal it.

5.  I painted the 2nd rabbit on my ring finger.  Start with a small circle for the head, then paint 2 lines for the ears.

6.  A bunny!!!  The body is an ovular shape and then 3 dots for the leg.  Make sure you put a dot for the tail too.


Hope you all have a happy and safe Easter long weekend!

- SheNailedMe